Git Bisect Your Bug Hunting Best Friend
Are you a bug hunter? Are you desperately trying to find where a bug was introduced in your long git history? If the answer is yes, you’re going to be happy to meet git bisect

What is it?
git bisect is installed by default with git. There is no tools or extra things to install.
bisect command is performing a binary search between a commit in which everything was working as expected and one in which a bug was present until it finds the responsible.
When should I use it?
Whenever you need to find whe(n|re) a bug was introduced.
Let’s assume that your working on a big project with a lot of developers on it. You’re using git on a daily basis and some day someone report you that a functionality is broken.
(Obviously this can’t happened in reality because you have a good testing strategy implemented, don’t you? ;) ).
So you don’t really know when the application stopped working as expected.
So you need to know which specific commit is guilty (and furthermore which developer is to blame!)
This is where git bisect kicks in!
Usage
We’re going to review how to use it in a standard use case. For this example, I have create a git repository
You can clone it on your computer using:
git clone https://github.com/requiremind/git-bisect-demo.git
and/or simply follow this tutorial.
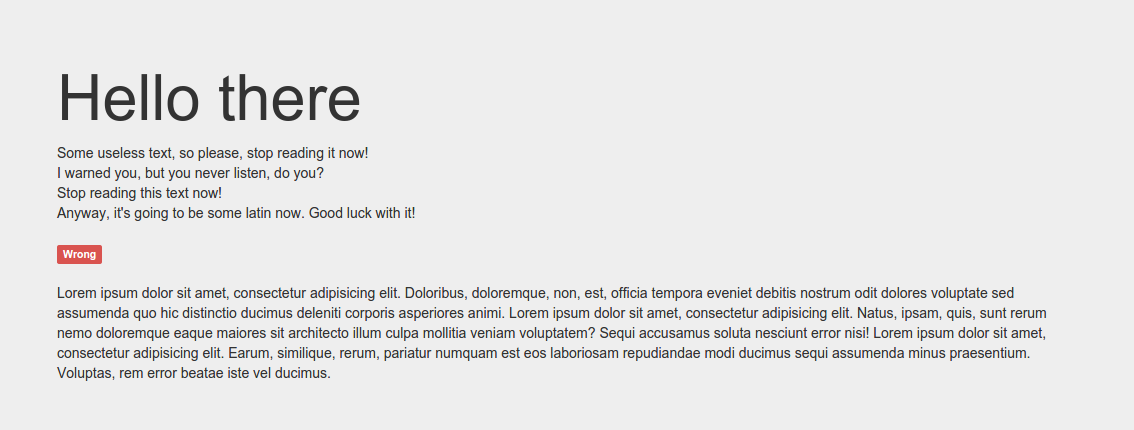
So, I have created a webpage (index.html)

and as you can see there is a wrong label on this page. Consider it as a bug or an unwanted behavior. We’re going to track it down and found where this was introduced.
So, first you run this command to launch bisect:
git bisect start
Then you type:
git bisect bad
This one says that the current commit (HEAD, but you can specify another one) contains the bug.
The next step is to give bisect a good commit (where you’re sure everything was working fine, like a release for instance). In our case we’re sure that the first commit was sane.
git bisect good 0db16be
So now, bisect is ‘calibrated’ and know the section in your git history to work on.
It then picks some commits (based on the binary search algorthm) and all you have to do is to look if the bug is still present in your application/page/whatever.
In our case, we simply refresh the page.

We can see that the red label is still present. So we say:
git bisect bad
bisect picks another commit for us and we need to test it again.

Yes! Good news, the red label isn’t present anymore! So we type in:
git bisect good
And we’re done! git bisect have find out which commit is guilty. In our case it’s the b768e24 - Lorem ipsum is cooooool!. We have successfuly found the problem origin and we now can easily fix it.
Before going back to work you need to enter
git bisect reset
to reset your HEAD to where you were before you started.
This example was really simple because it contains only a few commits and there is only one file. But in a real life case, it could be really useful!
Going further
You have found the bad commit. This is great, you can now check the files that this commit contains and you will easily find where the bug has been introduced. In our case, it’s in the index.html file on line 21.
So you can run the following to see who is guilty:
git blame index.html -L 21,21
In this case it’s.. me! Of course. This is a really cool feature that you could play with.
Last information about git bisect. In this example we were required to say manually on each commits picked by bisect if it was a good or a bad one.
This is really not a good way to go if you have a long git history.
Fortunately you can use a script to automate git bisect.
Your script should return 0 if it’s good or non-0 if a bug occured.
Then you simply run:
git bisect run bug-hunter.sh
You can retrieve all official documentation about git bisect.
Hope it will help you on your next bug hunting!